
Years ago, my mother made a lot of vests for me. It was my style at the time, and she used to be a master seamstress before arthritis took that from her. This vest, made from a lovely tapestry fabric, never had fasteners on it; it was designed to be worn open. However, I saw that the vest had potential as one that I could wear as SCA garb, with a simple addition: eyelets.
Now, I know metal eyelets aren't exactly period. Well, the It's Not Period Police will just have to give me a pass on this, because the use of metal eyelets and grommets is an accepted practice in the SCA.
Here is the vest, before altering:

Photo by Delphia Janiszeski, 2010
There are several things to consider before adding eyelets (or grommets) to any article of clothing:
- Type of fabric: Will the metal cause the material to run and fray, therefore ruining the garment?
- Thickness of fabric: If it's too thin, the eyelet will rip out; if it's too thick, the eyelet cannot be fitted together.
- Type of eyelets: The finer and fancier the fabric, the lighter you want the eyelet; if it's thick or heavy-duty material, you need grommets.
- Number of eyelets: How many eyelets will be needed in order to close the gap properly, without too much or too little space between them?
- Work surface: Keep in mind that you're hitting something metal; protect your table or whatever you're using (make sure it's stable) so you don't have dents or scratches in the surface.
In measuring the area with which I had to work, I settled on 7 eyelets. Visually it is appealing, being an odd number, and functionally the eyelets evenly cover the area which needs to be laced together, without gaps or puckers. Seven eyelets mean 14, since you have to do the same on both sides of the opening.
To begin, measure and mark the placement of the eyelets. I use the old carpenter's adage, "Measure thrice, cut once." Measure, measure, measure! Do not cut until you are sure the placement is correct. Fixing a bad eyelet is a lot of work, especially on tapestry fabrics.
Vest, placement marked

Photo by Delphia Janiszeski, 2010
Next, you need to cut a hole in the material to allow the top part of the eyelet through. The hole has to be a little smaller than the size of the shank of the eyelet, or you will end up with a lose and torn out eyelet. I find it easiest to use an X-Acto knife to make the first small "x" in the fabric, then center the top part of the eyelet over the hole, and from the WRONG SIDE of the fabric, carefully make the hole just big enough to get the shank through.
Once you have the top half in, it's time to set the eyelet to the bottom. Depending on the style of the eyelet, the shape of the setting tool might be slightly different. Be sure you are using the correct setter for the style. Set the bottom part of the eyelet, shank up, in the setter block.
Setting tool

Photo by Delphia Janiszeski, 2010
Line up the top half of the eyelet, which is in the material, with the setter block; place the setter in the hole, give it a couple of good (but not too hard) taps to set the eyelet. Check your work carefully; if you don't hit it hard enough, it won't work; if you hit it too hard, you will warp the eyelet and have to take it out and do it over. On this project, I messed up 4 eyelets because I hit it too hard. It MUST BE LINED UP correctly! This will cause problems too, and you won't like the way it looks when it's finished.
Setting the eyelet

Photo by Delphia Janiszeski, 2010
Once you've set the eyelet, gently check to make sure it doesn't pop apart. It's pretty annoying to wear your garment for the first time, and have the eyelet pop off while you're trying to lace it up!
First eyelet finished

Photo by Delphia Janiszeski, 2010
Continue on in this manner until you have all the eyelets set. If some of them don't come out exactly right, or exactly lined up....well, such is life. You can either be a perfectionist about it and take out the offender(s), or accept that things aren't always perfect, and move on with your life. Such is the case for me and my now-SCA-acceptable vest.
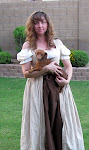
Finished vest

Photo by Delphia Janiszeski, 2010
I hope you've enjoyed this little piece. I hope to be documenting the construction of my new, Norman style, dress soon!
-- Beverly
No comments:
Post a Comment